Bones animation
Bones define the 'skeleton' of a model and are used as an alternative method
for animation. A bone is defined by
-
a hinge point that is either located at a fixed position in the model, or
attached to the end of a 'parent' bone,
-
a pan tilt roll orientation
-
a length
-
a set of vertices attached to that bone. If the bone moves or rotates, the
attached vertices move or rotate with it.
A model can be animated by changing the orientation of a set of
bones. This has the following advantages over vertex animation:
-
Bones animation in MED is easier and faster than animation by moving vertices.
-
Bones animations can affect only parts of the model, and thus can be combined.
For instance, a model can turn his head, shoot and walk at the same time. The
engine combines the three partial animations.
-
MDL files are smaller with bones animation than with a corresponding vertex
animation.
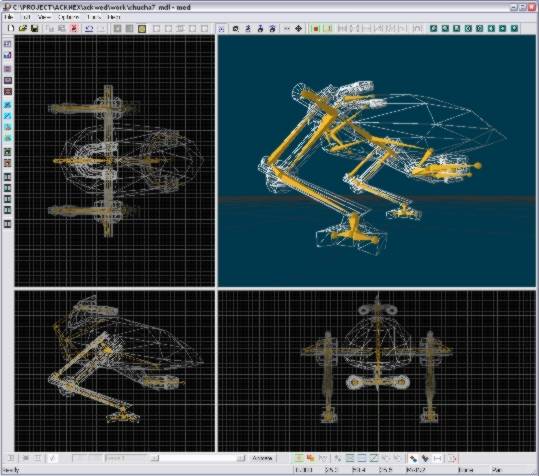
MED allows to create and connect bones, attach vertices to them, and record
bones animations. !! For bones creation and vertex attaching described below, make sure
that [Bone Mode] is activated, and [Animate] mode is not activated. When looking for a particular button, move the mouse over it - the button description will appear in the status line.
Creating bones
Activate [Bone Mode] and make sure that [Animate] is not activated.
Enter bone creation mode by clicking the
[Create Bone]
button. Left clicking into a window now creates a bone hinge point. The next left
click connects the hinge point with the click point by a bone. Further clicks
create a connected chain of 'child' bones.
[Del] deletes the last bone, and initiates a new bone
chain.
Alternatively, bones can be created by clicking and dragging. Clicking into an
existing hinge point attaches the new bone to the previous one.
Editing bones
In
[Move]
mode you can move the bones by selecting and dragging their hinges. In
[Move Children]
mode, moving a parent bone moves also all child bones; otherwise only the parent bone is moved. In [Move Progressive] mode the angles of the child bones are affected the more, the further away from the move origin they are.
[Fixed Bone Size] makes sure that the bone length stays the same.
Rotating bones
In
[Rotate]
mode you can rotate a bone chain by clicking a hinge and dragging
upwards/downwards. Rotating a parent bone also rotates all child bones when
[Move Children]
is activated.
[Move Progressive] affects the angle of the child bones with a linear increase.
Merging bones
You can merge two or several hinges the same way as you merge vertices - put
them together, select them and then click the
[Merge]
button. This way, several child bones can be attached to the same parent bone.
Attaching vertices to bones
Make sure that [Bone Mode] is active and [Animate] mode is not active
. Click the
[Apply Vertices Mode]
button.
Note the color of the vertices. Vertices already attached to bones
appear blue; free vertices are yellow; selected vertices are red;
and vertices attached to the selected bone are white. So you can always
see the status of any vertex in relation to the currently selected
bone. Activate [2D Vertices Ticks] or [3D
Vertices Ticks] for making the vertices bigger (adjustabble under
Preferences) and easier to select.
Now select a bone
by clicking it's hinge circle. The circle will become red and its attached
vertices white (if any). You have now three methods to attach vertices
to the bone:
-
If no vertex is selected, just click the [Apply
Vertices]
button. MED will automatically
find the closest yellow vertices that surround the selected bone, and select
them (for this the bone must be connected to a single child bone for definining its lenght). You can remove vertices from the selection by dragging a frame around them with [Shift] pressed. Another click on [Apply Vertices] attaches
the selected vertices to the bone. The vertices will become white, indicating that they now belong to the selected bone and move with it.
-
Manually select the yellow vertices that you want to assign to
the bone by drawing a frame around them (making them red) or clicking
on single vertices. Check the settings of [Select Connected] and [Select Touching] to make sure that you can select single
vertices. After selecting all vertices that should be attached to
the bone, click the [Apply
Vertices] button.
-
If one or several groups are selected, they are automatically assigned
to the selected bone, even if their vertices were attached to a
different bone before.
Make sure that vertices you attach to a bone are not already attached
to another bone. Otherwise remove them first. You can remove selected
vertices from a selected bone by clicking the [Remove
Vertices] button. For removing all vertices from all bones,
first leave the [Apply Vertices Mode] by
clicking the button again. Now select all bones by dragging a frame
around them, activate [Apply Vertices Mode],
select all vertices by dragging a frame, and click [Remove
Vertices].
Continue this until all vertices are blue, indicating that they are all
attached to bones.
Selecting in Bone Mode
If no object is selected, you can only select a bone. Clicking on a bone selects the bone and deselects all previously selected bones; clicking on a selected bone deselects the bone.
If at least one bone is selected, you can now select vertices and faces:
- Clicking onto a vertex selects the vertex and deselects all previously selected vertices. Clicking on a selected vertex deselects that vertex.
- Clicking on a face selects the group to which that face belongs (if the model has several groups), and deselects all previously selected groups. Clicking on a face belonging to a selected grpup deselects the group.
- Dragging a frame around vertices selects the vertices. If a group is selected, only the vertices belonging to that group are selected by dragging a frame.
- Dragging a frame around selected vertices with [Shift] pressed deselects the vertices.
- Clicking on a vertex or face with [Ctrl] pressed adds the vertex or group to the selection, without deselecting the previously selected vertices or groups.
- Clicking on empty space first deselects all vertices; a second click deselects all groups; and a third click deselects all bones.
Recording bones animation
Similar to recording a frame animation -
please see the model animation guide. First add one or several animation frames as
usual with
Edit/Manage Frames. Then click the
[Animate] button to switch from bones placement to bones animation mode.
Activate
[Use
Bones Animation] in the Animation Toolbar
. Now select a bone by clicking it's hinge point. You can move or
rotate the bone to it's desired position, as described in Creation
of bones.
When finished, add the next frame. For replay, you can toggle
between replaying a normal frame animation, and a bones animation, with the [Use Bone Animation] button.
For precise animation, select
[Bones Properties]
and click
[Animation Key]
on the panel. You can now change the following values for setting a bones
position and orientation:
| [Position] |
moves the bone and it's childs to the desired position. Note that
the parent bone remains attached to the bone, however it's not rotated although
it looks as if it were. |
| [Rotate1] |
rotates the bone and it's child bones about the bone position. |
| [Rotate2] |
rotates only the child bones about the bone position. |
| [Rotate3] |
rotates the bone and the child bones about the bone origin. |
If the bones properties panel is not open, you can toggle between the 3 rotate
modes by pressing
[1],
[2], or
[3]. The current mode is indicated in the status
line. For rotating a bone, click its hinge point and move the mouse upwards or
downwards.
!!
Bones animation usually means rotating (not moving) bones. Moving will give a different result as it moves the attached vertices to the new bone hinge position, rather than rotating them about the hinge.
By clicking
[Remove Bones Animation] the selected bone is reset
to it's default orientation and position.
When beginning a new animation scene that
should be not dependent on the previous scenes, select all bones
and reset their animation. This sets the model to its default bone
orientation at the begin of the scene. Only bones that are
different from their default orientation are then recorded in the
animation. The
[Disable]
flag temporarily excludes the bone from the animation. The flag is deleted when
Animate mode is left.
Playing bones animation:
Just like playing vertex animation, through the ent_animate
instruction. The engine makes no difference between bones and vertex frames,
with the exception that bones animation can be added together from an arbitrary
number of bones animation scenes.
Additionally to playing bones animation, bones can be directly scaled, moved or rotated by engine functions like ent_bonerotate. This way, head, eyes and arms can be moved independently of the animation cycle.
Please note:
Although vertex and bones animation can be combined within the same frame,
this is not supported by the engine. Thus a model can have either bones
or vertex animation, but not both.
If a model has both bones and vertex frames, the vertex frames must come
first (and are ignored by the engine).
Bones animation needs more memory space per entity, and more rendering
time than vertex animation. If you need huge armies of animated models on
the screen, you might prefer vertex animation.
Bones and vertex animation both use linear interpolation between key frames.
This can lead to deformations when the movement is nonlinear (as in a rotation)
and the 'gaps' between the key frames are too large; for example, limbs can
then get thinner and thicker during the interpolation. This can be solved
by using more key frames and taking care that rotations don't exceed 15 to
20 degrees between them.
► latest
version online