Using the physics engine
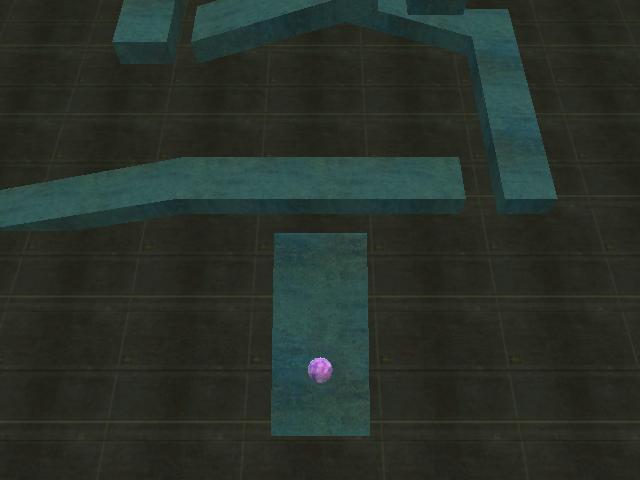
In this workshop we'll learn a bit about the third movement method that's described in the last lesson: physics-based movement. Start SED, then open the script19.c file. Run the project and you'll find yourself in a game level, where you can control a ball using the arrow keys.
The goal of this game (yes, it's a game!) is to move the ball until it reaches the small platform at the top of the level. Press the arrow keys and you will see that the ball moves as if an invisible force was applied to it. Well, in fact, an invisible force is indeed applied to it!
Since this is a playable game, its source code should be quite big, right?
///////////////////////////////////////////////////////////////
#include <acknex.h>
#include <default.c>
///////////////////////////////////////////////////////////////

VECTOR ball_force;
ENTITY* ball;

function main()
{
   level_load("roller.wmb"); // load the level
   ball = ent_create ("ball.mdl", vector(-400, 0, 100), NULL); // create the ball
   ph_setgravity (vector(0, 0, -386)); // set the gravity
   phent_settype (ball, PH_RIGID, PH_SPHERE); // set the physics entity type
   phent_setmass (ball, 3, PH_SPHERE); // and its mass
   phent_setfriction (ball, 80); // set the friction
   phent_setdamping (ball, 40, 40); // set the damping
   phent_setelasticity (ball, 50, 20); // set the elasticity
   while (1)
   {
      ball_force.x = 180 * time_step * (key_cur - key_cul); // move the ball using the cursor keys
      ball_force.y = 180 * time_step * (key_cuu - key_cud); // 180 sets the x / y movement speeds
      ball_force.z = 0; // no need to move on the vertical axis
      phent_addtorqueglobal (ball, ball_force); // add a torque (an angular force) to the ball
      camera.x = ball.x - 300; // keep the camera 300 quants behind the ball
      camera.y = ball.y; // using the same y with the ball
      camera.z = 1000; // and place it at z = 1000 quants
      camera.tilt = -60; // make it look downwards
      wait (1);
   }
}
Can you believe it? We're only using about 20 lines of code and everything happens inside function main! Now that's what I call the 'lite' in lite-C :)
You can see that we have defined a VECTOR named ball_force. A VECTOR is similar to a var, but consisting of three values: x, y, and z. We will store the rotation force of the ball on the x, y and z axis inside it. Then, we have defined an ENTITY pointer named ball, which will be used for our ball.
A roller.wmb level, which was created in WED, is loaded. Then, we create the ball, at x = -400, y = 0, z = 100 in the level, using the ball.mdl file. We have defined an entity pointer named ball, and this is the name that's given to our newly created entity.
The following lines of code register our ball entity with
the physics system and set its properties. Don't worry, we well discuss them one
by one.
- ph_setgravity(vector(0, 0, -386))
sets the global gravity for our ball. Normal values for the gravity vector
include x = 0, y = 0 and z set to a negative value, which makes the object fall
downwards. For a bit of fun, try to replace -386 with 100 and see what
happens.
- phent_settype (ball, PH_RIGID, PH_SPHERE) tells
our ball to become a physics entity, with a rigid body (water surfaces can be
created as well) and with a collision hull that behaves like a sphere. You see,
the shape of our model doesn't set its proper physics behavior automatically. If
I'd simply replace my earth.mdl sphere with a cube, the brand new cube would
continue to rotate and roll as if it were a sphere because phent_settype has told it to behave like one,
get it?
- phent_setmass (ball, 3, PH_SPHERE)
sets the mass of our sphere to 3 kilograms (6.6 lbs).
- phent_setfriction (ball, 80) sets
the friction coefficient to 80. The value can range from 0 (ice-like friction)
to 100 (rubber-like friction).
- phent_setdamping (ball, 40, 40) sets
the linear damping to 40 and the angular damping to 40. It's a simple and yet
effective method to simulate airdrag and friction; without damping, our ball
would continue to rotate ad infinitum.
- phent_setelasticity (ball, 50, 20)
sets the bounciness factor for our ball to 50 and the minimum speed to 20.
What's with this minimum speed? If the ball has a speed that's lower than 20
when it collides with something, its bounciness will be set to zero - this way
you can prevent lots of small, useless bounces from appearing.
I know that we've got a lot of fresh information here, but play with all the
numerical values and you'll learn what they're about quickly. Let's step right
into the while loop:
while (1)
{
ball_force.x = 180 * time_step * (key_cur -
key_cul);
ball_force.y = 180 * time_step * (key_cuu -
key_cud);
ball_force.z = 0;
These lines of code set the proper ball_force.x and ball_force.y values, depending on the status of the cursor (aka arrow) keys on the keyboard; key_cur is the predefined variable that tracks the status of the right arrow key, key_cul tracks the status of the left arrow key, and so on. As an example, let's see the possible values for ball_force.x, depending on the status of key_cur and key_cul:
a) ball_force.x = 0 when none of the
keys is pressed because key_cur = 0,
key_cul = 0, so 180 * time_step * (0 - 0) = 0; the
ball gets no force;
b) ball_force.x = 180 * time_step when the player
presses the right arrow key because key_cur =
1, key_cul = 0, so 180 * time_step is multiplied with (1 - 0) and the ball gets a positive force;
c) ball_force.x = -180 * time_step when the player
presses the left arrow key because key_cur =
0, key_cul = 1, so 180 * time_step is multiplied with (0 - 1) and the ball gets a negative force;
d) ball_force.x = 0 when the player
presses the left arrow key and the right arrow key at the same time because
key_cur = 1, key_cul = 1, so the multiplication factor is (1 - 1) = 0, the ball
gets no force.
The same things happen with the following line of code, which takes care of
the y force; by combining
the x and y forces of the ball, we can roll it to any spot
in the level. This (key_a - key_b) type of thing is common, being used in lots
of game in order to control player's movement, and so on - you'll see many
similar samples in the AUM.
You can see that the ball doesn't move at all on the z axis; you can use a
similar line of code here and make the ball move up and down depending on the
status of another two keys on the keyboard if you want to. Let's look at the
following line of code inside the loop:
phent_addtorqueglobal (ball, ball_force);
The phent_addtorqueglobal instruction applies a torque (an angular force) to an entity. In our case, the force given by the vector named ball_speed is applied to the entity named ball, making it rotate when the player presses the arrow keys.
If you followed our time_step explanation in workshop 10, you might wonder why we multiply the angular force with time_step. This makes the force the smaller, the faster the frame rate is. We have understood that the covered distance per frame depends on the frame rate, but a force should not - or should it? In this case, yes. You can see that we apply the force every frame inside the while loop. So, every frame our ball gets a little kick. If we would kick it with the same force any time, it would roll faster when the frame rate is high because it gets more kicks then. We eliminate this effect by using time_step for reducing the kick force dependent on the frame rate.
camera.x = ball.x -
300;
camera.y = ball.y;
camera.z = 1000;
camera.tilt = -60;
The last few lines of code inside the loop set a proper position for the camera (our "eye" inside the level). They place the camera 300 quants behind the ball on the x axis, while keeping the same y with it at all times. Finally, the camera is placed at 1000 quants in the level on the z axis and looks downwards because its tilt angle is set to -60 degrees.
Finally, some advice that comes straight from the creator of the ODE physics engine, which is built-in inside Lite-C (ODE, not its creator ;)): use small sized levels, small entities, and so on - the physics engine likes that. If you keep the proper proportions, the small levels won't look smaller than the bigger ones at all!
I hope that you are now encouraged to learn even more about the physics engine. Read the reference manual to see the other functions that are available, and most of all - make experiments!