Actions
An action is just a function attached to an entity: the player, an elevator, a monster, a weapon, etc. You can attach actions to any entity: model, sprite, wmb entity or terrain. They are a very convenient way to control the entity behavior without having to program a complicated 'game loop'.
You can attach actions to your entities using two methods: by programming or using WED (the latter of course only when your Gamestudio edition contains WED). Once we've added a script to a level in WED's Map Properties dialog, all the actions in our script automatically appear in WED's action list, just like in the picture below. They can be attached to an entity with just a mouse click (the [?] gives a description of the action - if it has one):
Placing entities in the level with WED and attaching actions to them however is too easy. We're doing the sporting approach today, which means we'll program them directly. Besides that, if we own lite-C only we can't use WED and thus we have no other choice. Let's take a look at the differences between actions and functions:
action add_numbers( )
{
b
= a + 5;
}
function add_numbers( )
{
b
= a + 5;
}
The action and the function look pretty much the same. There are only three differences. A function can return a value, an action can't (return values will be explained in another workshop). The second difference is that an action appears in WED's action list above, and can thus be attached to an entity. And the third difference is that an action begins to run automatically as soon as the entity that has the action attached to it is loaded. A function however needs to be called if we want it to run (read the third workshop for more details).
You should use an action only when you want to control an entity; use functions when you don't have to deal with entities (for example, when you are adding numbers, like in my example above).
Ready for action? Start Lite-C and open the file named script10.c in the workshop10 folder:
///////////////////////////////////////////////////////////////////////////////////
#include <acknex.h>
#include <default.c>
///////////////////////////////////////////////////////////////////////////////////

action rotate_plane()
{
    while (1)
    {
        my.pan = my.pan + 0.1;
        wait (1);
    }
}

function main()
{
    level_load ("work10.wmb");
    vec_set(camera.x,vector(-500, 0, 100)); // place the camera at x = -500, y = 0, z = 100
}
Let's run the script right away:
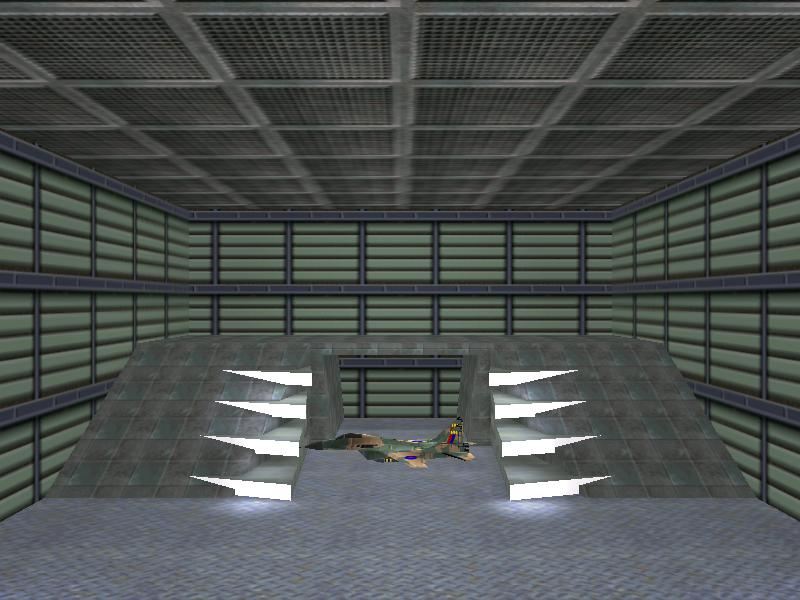
The plane is rotating! If you have studied the 8th workshop (position, angle and scale) you know that the plane is changing its pan angle continuously.
Some of the code should be easy to understand because we went through it several times. Let's concentrate our attention on the main function:
function main()
{
level_load ("work10.wmb");
vec_set(camera.x,vector(-500, 0,
100)); // place the camera at x = -500, y = 0, z = 100
}
First of all, we load the hangar
level that was used in the 8th workshop as well. But this time we're not just
going to sit back and admire the level, because loading a level is like going
from 2D to 3D: suddenly we've got many more functions at our disposal.
The last line of code inside function main() sets the position of the camera
to x = -500, y = 0, z = 100 in the level. We are using vec_set, an instruction
that copies the values from inside the “vector” parenthesis to camera.x,
camera.y, camera.z (another example of the dot method usage). Of course that I
could have written the code this way:
camera.x = -500;
camera.y = 0;
camera.z = 100;
and it would have worked just fine. Please note that even though we’re only
using camera.x in our example, vec_set knows that it is supposed to copy the
coresponding value to camera.y and camera.z as well.
Time to check out the action that is attached to our plane:
action rotate_plane()
{
while (1)
{
my.pan = my.pan + 0.1;
wait (1);
}
}
Now that’s a short, and yet a bit weird action! What’s with that while(1)? Some of the actions or functions from our applications or games need to run for a longer period of time - some of them might need to run from the moment we start the game until we shut it down!
If you want to create a game that looks and plays like (let’s say)
Minesweeper, you have to make sure that you can move the mouse all the time;
otherwise, you will be unable to click the squares, not to mention that you will
not be able to end the game by clicking the "x" in the upper right corner of the
window.
All the functions and actions we've studied so far do their job well but they
aren't running all the time; they execute something, and then they arrive at
their end, so they stop running. The plane that was used as an example in this
workshop rotates all the time; you’ve guessed it – the while (1) instruction
keeps the action running forever.
First of all, while (1) creates a loop, a piece of code that repeats the set
of instructions that are placed between its pair of curly brackets; a typical
while loop definition looks like this:
while (some condition is true)
{
// repeat the instructions that are placed
inside the curly brackets
}
Our loop uses a while (1) condition; that's the short form for "as long as 1 = 1", which means that the loop will run forever. You have to use a while (1) loop whenever you need an action that must run continuously, be it a player, an elevator, an enemy, etc. Ok, so the while(1) line of code from inside the action named rotate_plane tells the entity to repeat what's inside the loop forever, but what's inside the while loop? What does this loop repeat forever? Only two lines of code:
my.pan = my.pan + 0.1;
wait (1);
The first line of code adds 0.1 degrees to the pan angle of the plane. The plane starts with an initial pan angle of 0 degrees and then its pan will be set to 0.1, then 0.2, and then 0.3, .... degrees, so the plane will rotate around its pan angle. In case that you are wondering, the plane will increase its pan angle until it reaches 360 degrees (a full rotation) and then it will continue its rotation.
But what's with that "wait (1);" instruction? We know that this line instructs the engine to wait exactly one frame, and then to continue after the wait. That is, to continue repeating the loop. So we can be sure that the code from inside the while loop is executed once every frame - no more, no less. We'll encounter loops like these very often in our future game developer career.
Wait and Multitasking
Let me ask you something in that context: have you ever heard about multitasking? It is the ability to run several programs at the same time. Right now you are reading this workshop, maybe you are listening some music on the same pc, from time to time you run the engine on the same pc, maybe you have an antivirus that sits in the system tray... all these programs appear to run at the same time because the computer switches from one task (program) to the other very quickly, making you believe that all the applications run at the same time.
The same thing happens with the while loops; they need to allow the rest of the actions and functions in your game to run. A while loop that doesn't pause from time to time will eat all the computer resources because it wants to repeat what's inside the loop over and over; even the clock that appears in the system tray in windows will be unable to update the time if you have created a while loop that doesn't stop at all!
So how do we pause a while loop? This is just done by the "wait (1);"; this small line of code allows all the other actions and functions to run their own code.
Let us discuss a little about frames and frame rates. What you see on your monitor when you play a game is nothing more than a series of still images (pictures, frames) that are displayed one after the other. If your PC can display 50 pictures a seconds, it runs the game at 50 frames per second. The frame rate in this case would be 50 frames per second (50 fps). A wait (1) instruction will tell the function or action that contains it to stop running while the PC is displaying one of those 50 pictures – and this will happen 50 times per second!
!! Every while (1) loop must include an instruction that interrupts it, normally using a wait (1); instruction. If you forget to add a wait instruction inside the while (1) loop, or any other way to interrupt or terminate the loop, the engine will run the loop forever without any pause. This means that your program will freeze and you won’t be able to stop or terminate it. That's no joke - try it if you dare! Read the reference manual to learn more about "wait".
Using time
Did you know that your potential customers have different PCs? Oh, you knew that already? Well, then maybe you have thought that your game will run at different frame rates on their PCs. How and why should this trouble you? Let's simulate a very slow PC and check what happens. Insert the following (green) line inside the main function:
function main()
{
fps_max = 20;
video_mode = 7;
level_load ("work10.wmb");
...
This line of code limits the frame rate to 20 frames per second (fps). Run the script file and you will notice that the plane rotates much slower this time.
Now press the [Tab] key on your keyboard to bring up an old friend (the console) and then type the following line of code and press [Enter]:
fps_max = 60;
The rotation is a lot faster again! On my PC, the plane running at 20 fps had
made a full rotation in about 100 seconds, and now at 60 fps it needs about 30
seconds for a full rotation! Normally some (if not most) of your customers will
have old PCs and the frame rate will be smaller on their systems. But don't
forget that their money have the same color! How can we please them all?
Here's the golden rule: your game must run great on new, fast PCs and it must run as good as possible on old, slow PCs. Conitec has done a great job with lite-C, making sure that it will run on any decent 3D card available on the market. Let's see what YOU can do about that:
- You can bundle your game with the hottest 3D card available on the market. If you sell many copies of your game, the 3D card supplier might give you a big discount :)
- You have to program your game wisely, making sure that it will run at the same speed (not at the same frame rate!) on the PC listed as "Minimum hardware requirements" on the game box, as well as on the newest PC that will be available in 2010.
Let's get back to our example. The frame rate will be bigger or smaller depending on the configuration of the PC and there's nothing you can do about that; however, you should make sure that the plane from our demo (just an example, of course) makes a full rotation in the same number of seconds even if the frame rate ranges from 10 to 1000 fps.
One of the methods that could be used is setting fps_max to a small value, thus limiting the frame rate to that of the oldest PC possible. This fixed frame rate technique was heavily used in old games and cheap engines, but today it isn't considered to be good enough. Your game must run at the highest possible frame rate on high end PCs (that's why they've paid more money!) and at a decent frame rate on weak PCs, so you shouldn't limit the frame rate to a low value.
If I set fps_max to 20 and my customers have new PCs, I treat them as if they were customers with ancient PCs, not to mention that the problem isn't solved for the guys with PCs that can deliver only 10 fps. I have told you that fps_max only sets the upper limit for the frame rate; there isn't any magical instruction to double or triple a small frame rate! On a side note, the frame rate depends only on the CPU and the video card; adding much more memory or a bigger hard drive won't increase the number of frames per second.
Well, now that you know all there is to know about the problem, let's see the solution! You will have to edit a single line of code in your script10 file:
action rotate_plane()
{
while (1)
{
my.pan = my.pan + 2 *
time_step;
wait (1);
}
}
Save the script and run the level again; you will notice that the plane makes a full rotation about its pan angle in about 10 seconds. Let’s allow a bigger frame rate (if your PC can deliver it) by setting fps_max to 200 inside function main; edit main(), making it look like this:
function main()
{
fps_max =
200;
...................
}
Hmmm... the plane needs the same 10 seconds for a full rotation, even though the frame rate has increased from 20 to 200 fps! I know! Let’s give the engine a hard time, by setting fps_max to 5!
Well, I did that and I have to admit that time_step does its job! The movement is choppy because the plane updates its angle only 5 times per second, but it needs the same 10 seconds in order to perform a full rotation...
With the new version of the code, the frame rate doesn't have any impact on the rotation speed! Try to set several different values for fps_max (5...200) and you will notice that the rotation speed is almost independent on the frame rate. Now what is it with that mysterious time_step and how does it work?
The time_step variable gives us the duration of the last frame in Ticks. What is a tick? I suppose it's a legacy time unit from the past of the engine when 3D games ran with about 16 frames per second. 1 tick is precisely one sixteenth of a second, or 1/16 = 0.0625 seconds = 62.5 milliseconds. You have to keep this relation im mind when using time units in the engine.
The relation between time_step and the frame rate (fps) is this:
time_step = 16 / fps
In a game of 16 frames per second, the frame duration is 1 tick and thus time_step is 1. At double frame rate (32 fps), the frame duration is only half a tick and thus time_step is 0.5; notice how time_step decreases its value as the frame rate increases. If we add or subtract a quantity that’s multiplied by time_step, we'll get a constant increase or decrease regardless of the current frame rate. Time to take a look at our time_step line of code once again:
my.pan = my.pan + 2 * time_step;
Let’s pretend that we have set fps_max to 200; this means that our loop, which takes care of the plane’s rotation, will be executed 200 times per second, and time_step will be 16 / 200 = 0.08
The plane starts its action with an initial pan angle of 0 degrees; one frame later, its pan angles has increased by 2 * 0.08 = 0.16 degrees. After another frame (the second frame), pan has grown to 0.16 + 0.16 = 0.32 degrees, and so on. After 200 frames (a full second if the project runs at 200 fps), the pan angle has grown to 0.16 * 200 = 32 degrees. Since a full rotation has 360 degrees, we can now compute the exact number of seconds that are needed for a full plane rotation: 360 / 32 = 11.25 seconds.
Now let’s assume that we have set fps_max to 5; this means that our loop will be executed 5 times per second and time_step will be 16 / 5 = 3.2
The plane starts its action (once again) with an initial pan angle of 0 degrees; one frame later, its pan has increased by 2 * 3.2 = 6.4 degrees. After another frame (the second frame), pan has grown to 6.4 + 6.4 = 12.8 degrees, and so on. After 5 frames (a full second if the project runs at 200 fps), the pan angle has grown to 6.4 * 5 = 32 degrees.
You can now see that the plane adds 32 degrees to its pan angle every second, even if the frame rate ranges from 5 to 200 fps.
If you want to move or rotate something in a PC game you need to multiply the movement and / or the rotation speed by time_step. Let's pretend that we want to move an entity by increasing its x coordinate in a while loop:
action move_entity(
)
{
while (1)
{
my.x += 1;
wait (1);
}
}
First of all, note the short
my.x += 1;
instruction; it’s the smarter, faster and wiser looking form of
my.x = my.x + 1;
In case you were wondering, you are right; we could have used:
my.pan += 2 * time_step;
instead of
my.pan = my.pan + 2 * time_step;
You can this technique for all your math operations, not just for the addition; you’ll see many examples in the following workshops.
Anyway, let’s get back to action move_entity( ) and assume that my PC is ancient and delivers only 25 fps, while your new PC can deliver 100 fps. This means that the while loop from above runs 25 times a second on my computer and 100 times a second on your computer. In other words, my PC adds 25 (1 unit / frame) to the x coordinate of the entity every second, while your PC adds 100 (1 unit / frame) to the x coordinate of the entity every second.
The space / distance measurement unit used by lite-C is a quant. How many inches is a quant? Well, that depends on the scale used by your game. So one quant can be one inch in a first person shooter, or can be one meter in a strategy game. In the lessons here we've scaled the models so that a quant is approximately equal to 1 inch. It’s just a convention, but this scale works fine for most projects.
Now take a look at the picture below to see the distances covered on our PCs over the same interval of 3 seconds:
And now let's use that miraculous time_step variable:
action move_entity(
)
{
while (1)
{
my.x += 1 *
time_step;
wait
(1);
}
}
The loop continues to run 25 times a second on my PC and 100 times a second on your PC; we can't change that. However, the distance covered each frame will depend on the frame rate now. Let's do some simple math calculations:
time_step = 16 / 25 fps = 0.64 on my
PC
time_step = 16 / 100 fps = 0.16 on your
PC.
This means that the entity will cover a distance of 25 frames * 1 * time_step = 25 * 1 * 0.64 = 16 quants a second on my PC and 100 frames * 1 * time_step = 100 * 1 * 0.16 = 16 quants a second on your PC! The entity will cover the same distance on any PC, no matter how big or small is the frame rate.
How do we use time_step in our projects? Maybe you've learned in school physics that distance is speed multiplied by time. So we just multiply all our speeds and angular speeds (the right side of the expressions or the figures that appear in our expressions) with time_step to get our resulting distances and angles. That's it! Here are a few examples:
“my.z += 2;” should be changed to
“my.z += 2 * time_step;”
“my.roll += 1;” should be changed to
“my.roll += 1 * time_step;"
There are few more parameters that can influence time_step (like time_factor, time_smooth, fps_min) but you will learn about them in the reference manual. Don't worry if you are feeling a bit disoriented: we are going to use time_step in all our future workshops, so you'll become a time_step master in no time!