
Previous: Position, angle and scale
Entities
Entities are 3D objects that can be added to your levels. There are four types of entities: models, sprites, map entities and terrain entities. In the Entities chapter of the reference manual you'll find a detailed list of their features and differences. This workshop will give you some hints on how to choose your entities.
Model entities
A model is an animated 3D object, stored in a file that has the extension "mdl". The models can be created with modeling software such as MED (a free download at Conitec’s web page), 3D Studio Max, Maya, Lightwave, Milkshape, etc. A model consists of several triangles (also known as faces or polygons) glued together and a skin that covers them. Whenever we need a 3D animated object (for the player, its enemies, some animals, etc) we need to use a model. We should use models for all the characters in our game.
If you plan to create a commercial quality game, you must have a polygon budget. If every game character used in your game will have ten thousands of polygons, you will need a high end PC to run the game. Ok, you might have a fast PC but what about your customers? Will they run your game on the fastest PC available on the market? I don’t think so...
It might sound odd for a young 3DGS apprentice, but we aren't living in a "perfect" virtual world. If you plan to make money out of your game you need to plan it carefully. How many monsters can be visible at the same time? Should I use models for my trees or should I use simple 2D pictures for them? Do I really need that great looking explosion effect?
Since many of my potential customers will have slower PCs, I need to set a polygon budget of (let's say) 200,000 polygons. If I want to create a 3D strategy game and I plan to have up to 250 units visible at the same time on the screen, they should have less than 200,000 / 250 = 800 polygons each, get it?
It is always a good idea to keep the polygon count (the number of triangles) for your models as small as possible. Let’s take a look at the picture below:
The two soldiers look pretty much the same but the modeler has managed to save 250 polygons for the model on the right. This allows me to place 307 models of this type in my level instead of 222 and all these models can be visible at the same time!
Important tip: Normally only the models that are visible on the screen have an impact on the frame rate. If you have 300 enemies in your game but the player can’t see more than 10 enemies at the same time, don’t worry: the engine will think that only 10 enemies are there so the frame rate will be kept high.
Everybody can make a model that has a huge polygon count, but a good modeler can create an impressive looking model without using too many triangles. Please remember that not only the characters eat precious computer resources: if you have a house, a car or any other entity in a level, it will use additional resources. The good news is that Acknex provides the perfect tools that should help you optimize your level; you can find several articles and code examples inside the Acknex User Magazine (AUM).
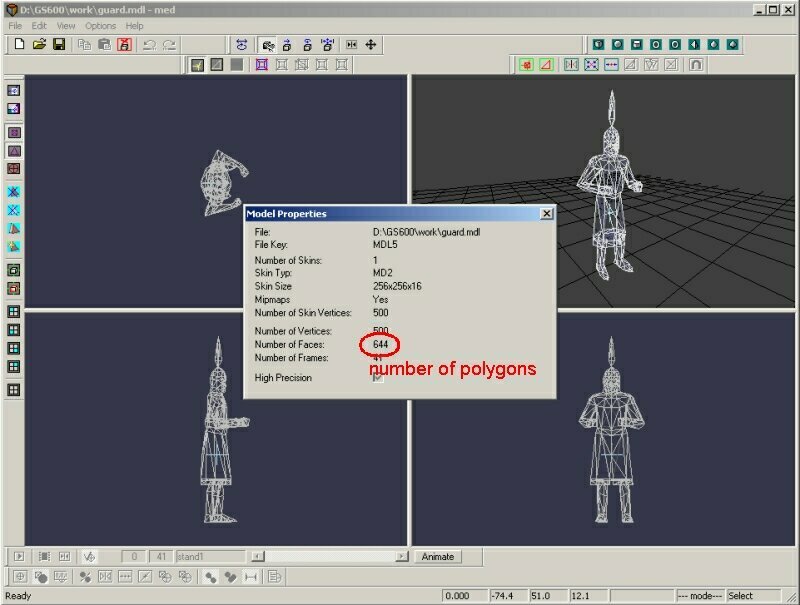
Open any model in the model editor (MED), choose File / Model Properties and you will see its number of polygons (faces):
Sprite Entities
Sprites are nothing more than 2D images created by a painting program. They aren’t 3D objects; let’s imagine that they are extremely thin pieces of paper for now. We can use sprites for panels, street signs, paintings, 2D games, special effects... we can even use them as fake 3D objects: trees, bushes, grass, etc.
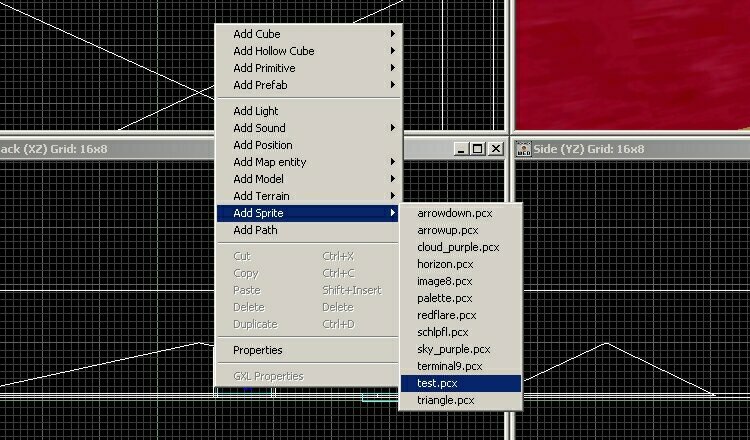
Create a bitmap in your favorite painting program, save it as a pcx, bmp, tga, or dds file, copy it inside your game folder (the same folder where you have saved your wmp level file) and then you can add it to the level, like in the picture below:
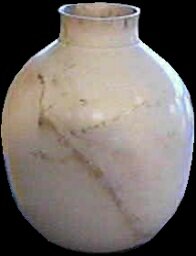
Any sprite can have transparent parts, just like a panel with its overlay flag set. You should use RGB = 000 for the transparent parts:
Now let's see how this sprite looks inside a test level:
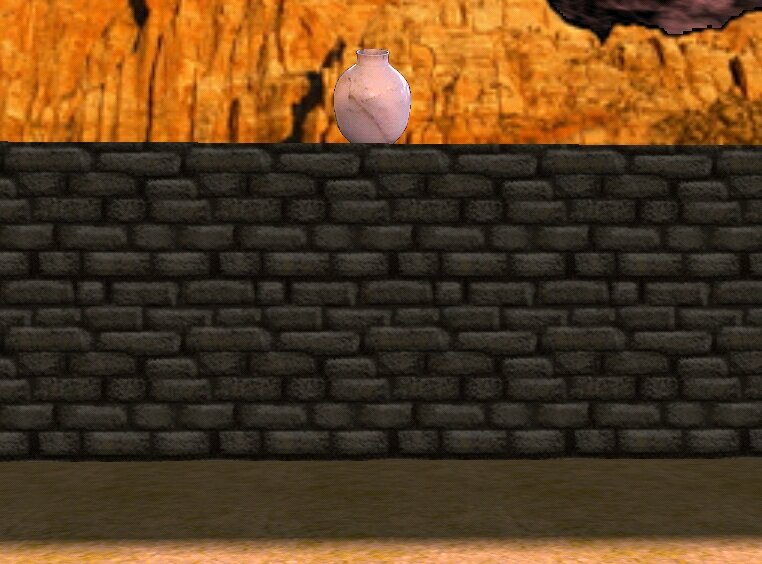
If the player can't climb up the wall, there's no need to use a model for the pot; a simple sprite will look the same and it will use less video memory.
The sprites can be set up in one of the following ways:
1) Oriented sprites, just like the paintings hanging on a wall;

If I rotate around an oriented sprite I can see that it is nothing more than a 2D object, so it would be wise to use an oriented sprite for a sign on the wall, a painting, maybe a blood spot on the floor, etc.
2) Sprites that face the player all the time.

This is your regular sprite type, the one that is used as a fake 3D object in order to maximize performance of weaker PCs. You can turn around it as many times as you want - it will show you its front all the time.
How do we create a normal sprite? The answer is simple: we add our sprite to the level in WED and that's all! We've got ourselves a normal sprite, a billboard that faces the player all the time.
How do we create an oriented sprite? We add the sprite to the level in WED and then we change one (or more) of its angles in WED. This way we can create a sprite that can be used for a carpet, a painting, etc, depending on the values set for its angles. Right click the sprite in WED, choose Object Properties, then Position:
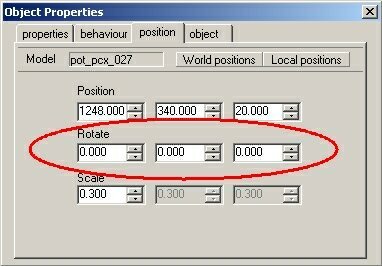
The red ellipse surrounds the three angles that can be changed. These (default) values of 0, 0, 0 for pan, tilt and roll are used by a normal (not oriented!) sprite. Adjust any of these angles and you will turn a regular sprite into an oriented sprite. You could set pan to 0.01 degrees, tilt to 0.001 or 67.005 degrees or roll to 55.000 or 255.000 degrees; any value will do the trick but you have to make sure that you like what you get in WED.
A final thought before moving on to map entities: some of the ancient 3D accelerators don't display sprites if they are bigger than 256x256 pixels. Make sure that your sprites have 256 x 256 pixels or less if you want to be able to run your game on very old PCs with a a Voodoo2 or Voodoo3 card.
Map Entities
A map entity is a rigid 3D object, created by the level editor WED as a separated piece of geometry and stored as a .wmb file. Map entities can be used for level parts which move or disappear as a whole, like breakable walls, doors, platforms, elevators or vehicles. These entities are nothing more than little compiled level maps, so they can't change their size at runtime - use a model or a sprite if you need that feature. You can convert any level file (could be a simple door) into a map entity by loading or creating the wmp file in WED, building it and copying the wmp and the resulting wmb file into the current level folder. You'll find many predefined doors, furniture, vehicles, etc that can be built in the \prefabs folder inside your 3DGS folder.
Terrain Entities
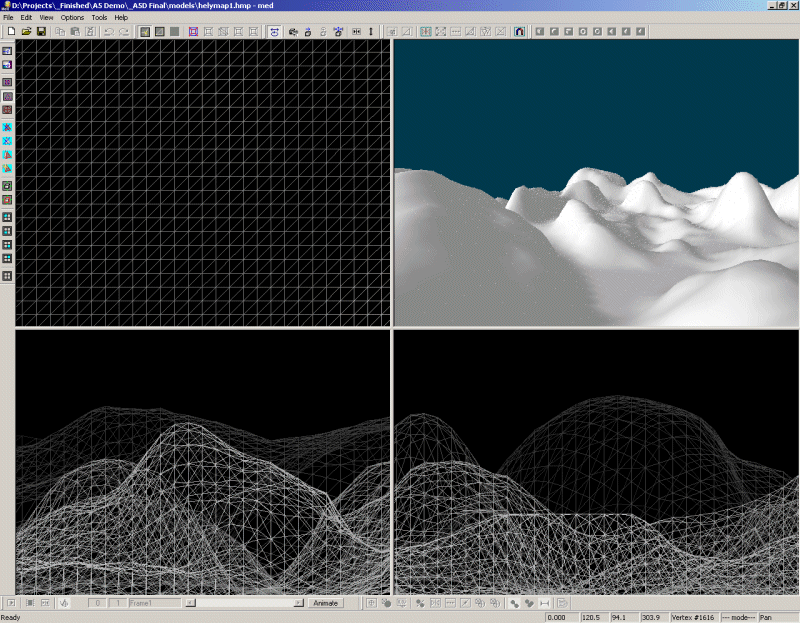
A terrain entity consists of a big texture mapped onto a rectangular grid of height values, like in the picture below:
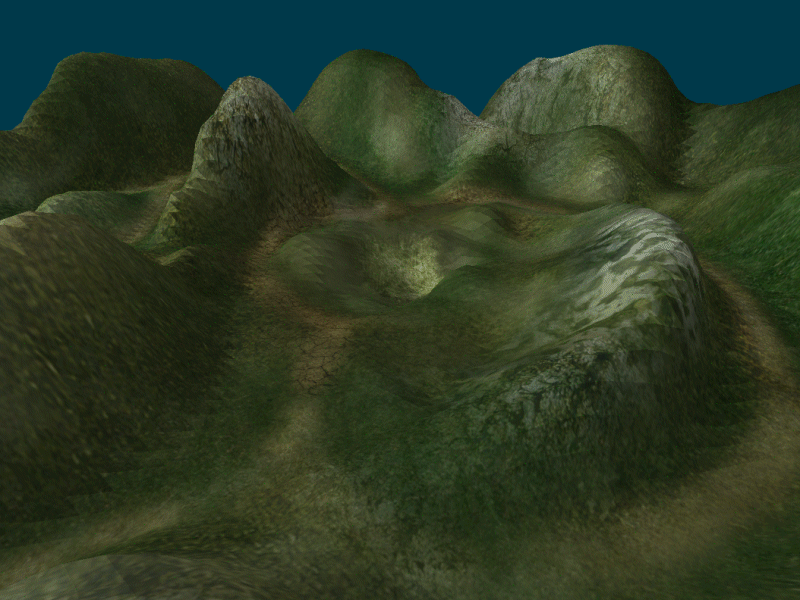
The texture that covers the terrain can include roads, snow, rocks, etc. Let's take another look at the terrain, this time with a texture mapped onto it:
This picture was taken from within the model editor MED; the terrain looks even better when it is used in the game!
You can create terrain entities in MED using its Magnet tool or you can import height maps created by other programs (Bryce, Terragen, etc). A typical height map image is a grey scale picture that looks just like the one below:
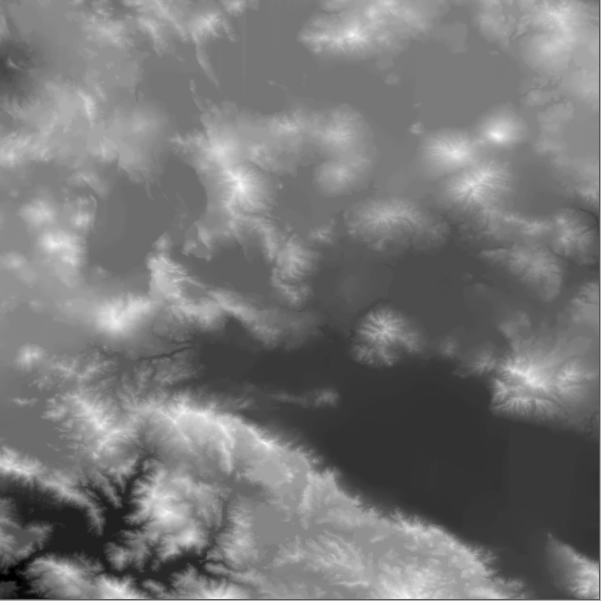
This picture will be converted to a terrain entity by MED; the white areas have higher altitudes while the darker areas will have lower altitudes.
Terrain entities are stored as files with an .hmp extension. You can find a detailed description of the different types of entities in WED's help file. The entities can be created using one of these methods:
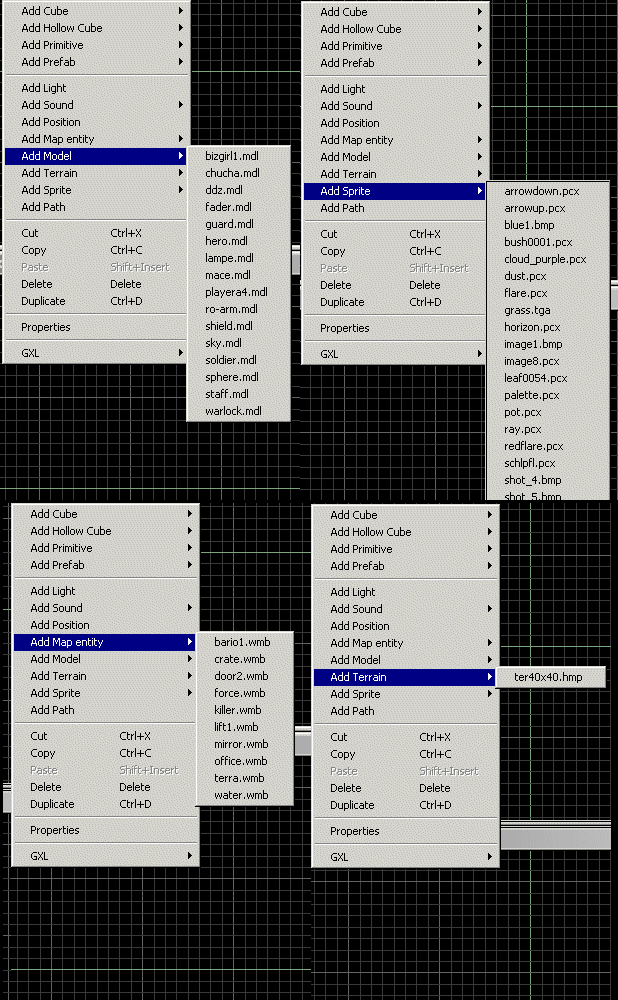
- by placing them in the level using the level editor WED, just like in the picture below;
- by creating them in the level at runtime using an ent_create instruction that looks like this;
ent_create ("drone.mdl", vector(100,200,300), start_drone); // create a drone
- by writing an ENTITY definition in the script:
ENTITY* rocket_ent =
{
type = "launcher.mdl";
layer = 10;
x = 100;
y = -10;
z = -10;
flags2 = SHOW;
}
We won't discuss the code but I wanted you to see how it looks right now - it isn't that complicated to work with entities when you are using the Acknex engine.
Why would you want to create an entity when you can add it to the level using WED? Well, maybe because you want to have visible bullets for your guns, or a swarm of particles whenever the bullet hits a wall. If you are going to fire 100 bullets using one or more of your weapons it wouldn't be wise at all to place them in the level; you'd better ent_create them when you need them.