
Workshop 07: Strings, texts and fonts
We have learned how to display panels, digits and a lot of great looking panel elements. If we need to display a text (the name of the player, a message, etc) we have to use strings and texts. And if we want our texts to stand out of the crowd, we need to use good looking fonts. In this lesson we'll also learn how to dynamically change panels, texts, or anything else while our game or application is running.
Strings
A string is a sequence of characters: letters, numbers, symbols. Here are a few string examples:
STRING* player_str = "Johnny
Bravo";
STRING* my_very_own_string = "I'm even
cooler than the coolest!"
STRING* player_meets_monster = "Die
now! I won't have time for that later!";
STRING* crypto1234 =
"a#45@123--//";
STRING* test_string = ""; // empty
string
STRING* riddle = "#100"; // string which
stores up to 100 characters
We can learn a few things just by looking at the definitions above:
1. Every string must be defined before being used, using the keyword "STRING*".
2. The content of the string (if any) must be given between quotation marks "".
3. We can assign a sequence of characters to our strings as we define them or we can create empty strings that will be filled with characters later.
4. A string can have a specified length; STRING* riddle = "#100"; creates a string named riddle that can store up to 100 characters.
5. Every lite-C line needs to end with a semicolon; don't forget to out a semicolon at the end of your string definition.
6. The same naming conventions that are used for variables apply for string names. I like to add _str to my strings but you don't need to do that.
The strings can't display anything on the screen by themselves; they need to be placed inside a TEXT definition.
Texts
A text is an object that can display one or several strings on the screen. Here's a simple text definition:
TEXT* first_txt =
{
pos_x = 300;
pos_y = 250;
layer = 3;
font = some_font; // previously
defined font
string (my_string);
flags = SHOW;
}
It looks a lot like a panel, doesn't it? The good news is
that its definition is really simple:
- pos_x and pos_y give the distance (in pixels) to the upper left corner
of the screen;
- layer determines which elements on the screen are covered by
the text;
- font gives the name of the previously defined FONT that will
be used for the text. If it is omitted, the built-in font will be
used;
- string sets the name of the
string that will be displayed. Strings are used for
TEXT elements just like digits or buttons are PANEL elements. So a TEXT can have
not only one but any number of strings. And just like with BMAPs and PANELs,
you can either give names of previously defined strings, or define
strings inside the text definition, using quotes at their beginning and end;
- flags = SHOW makes the text visible.
It really is simple! I can't wait to see a text on the screen!
Open script07 - it should look like this:
////////////////////////////////////////////////////////////////////
#include <acknex.h>
#include <default.c>
////////////////////////////////////////////////////////////////////
STRING* aloha_str = "Welcome to Paradise Island!";

TEXT* greetings_txt =
{
  pos_x = 300;
  pos_y = 250;
  string (aloha_str);
  flags = SHOW;
}
////////////////////////////////////////////////////////////////////
function main()
{
  screen_size.x = 800;
  screen_size.y = 600;
  screen_color.blue = 150;
}
You can see that we have defined a string named aloha_str:
STRING* aloha_str = "Welcome to Paradise Island!";
Don't forget that you can put anything else (characters, numbers, symbols) between those quotation marks. Our text definition is really simple; let's run our script file!
Dynamically changing objects
Ready to learn something new? Let's add a few lines to function main, making our script file look like this (green = changed lines of code):
////////////////////////////////////////////////////////////////////
#include <acknex.h>
#include <default.c>
////////////////////////////////////////////////////////////////////
STRING* aloha_str = "Welcome to Paradise Island!";

TEXT* greetings_txt =
{
    pos_x = 300;
    pos_y = 250;
    string (aloha_str);
    flags = SHOW;
}
////////////////////////////////////////////////////////////////////
function main()
{
  screen_size.x = 800;
  screen_size.y = 600;
  screen_color.blue = 150;
  wait (-3);
  greetings_txt.pos_x = 500;
  wait (-3);
  greetings_txt.flags = 0;
}
Run the script07.c file again and you will see that the text is moved towards the right side of the screen, stays there for a few seconds, and then it disappears. The code that does all these things is located, as you have guessed, inside function main, so let's discuss it right away:
wait (-3);
greetings_txt.pos_x = 500;
wait (-3);
greetings_txt.flags = 0;
First of all, "wait(-3);" is a
predefined engine function that instructs the program to wait for 3 seconds.
Please pay attention because this could be the most important phrase I've
written so far: we can access (almost) any property / feature for an object,
like a PANEL or a TEXT, using the "dot method" as shown below:
object.property
In our example, the first
line of code that uses the dot method is this:
greetings_txt.pos_x = 500;
Our text object has a property named pos_x which sets its position on the x
axis. This line simply sets a new pos_x value for the text, placing it 500
pixels away from the left border of the screen. You can find out about all the
predefined objects and all their properties in the reference manual. Now let's
take a look at the last line of the code:
greetings_txt.flags = 0;
This line sets another predefined property named “flags” to zero. This will reset all the flags for our text, including the SHOW flag (the only flag we've set), so our text will disappear from the screen. If you are wondering what other properties of our text can be changed using the dot method, the answer is simple: almost everything. We can set a new string for our text, we can change its x and y position, we can make it visible or invisible... lots of things!
A good student such as you should know how to create a panel with two buttons which run two tiny functions that change pos_x and pos_y for our greetings_txt, right? Why don’t you take a break from this workshop and write that piece of code right now?
What are you saying? You have to look after your cat and you’d lose your
energy if you’d write the program? Ok, let’s continue with the workshop
then...
We can use the dot method to control panels, texts, entities (be patient, we
will get there too)... Ok, I'll give you a few more examples:
display_pan.flags = 0; // resets all flags of
the panel named display_pan
test_pan.flags |= SHOW; // shows the panel
named test_pan
(hi_txt.pstring)[0] = newstring_str; //
spooky, but we’ll decipher it later – sets a new
string for hi_txt
error_pan.pos_y = 300; // sets a new pos_y
value for the panel named error_pan
wizard.z = 200; // set the height of an
entity named “wizard” to 200
You might have noticed that my text definition doesn't include a "font = some_font_name;" line of code. If you forget to do that, the engine will use its built-in font and this is exactly what has happened here. You'd like to use a new font, wouldn't you?
Fonts
A font is a set of characters that can be used for our
texts. The engine can use two types of fonts:
- true type fonts,
just like the ones used by Windows;
- bitmap fonts; a
set of characters that is read from a bitmap file.
True type fonts
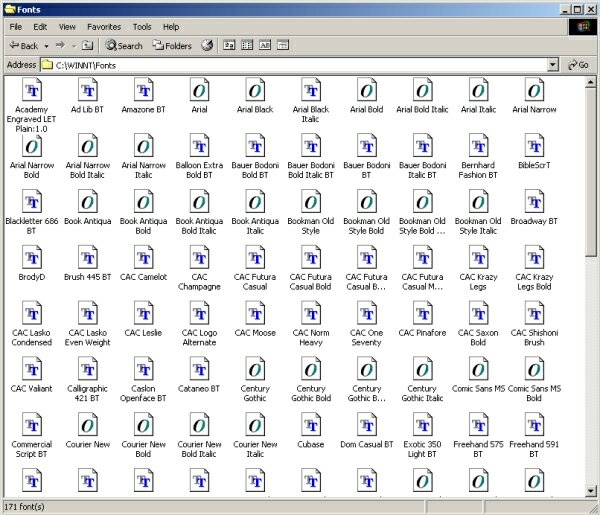
You have many true type fonts installed on your pc; open the folder named \fonts inside your windows folder and you should see them:
If you double click a font you will see its full set of characters, as well as some text samples:
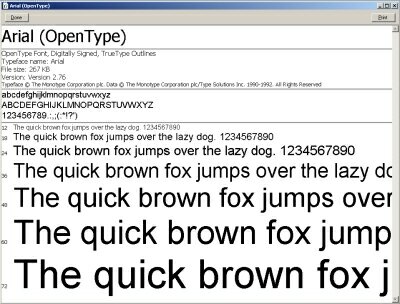
This is your regular true type font and you can see that the characters aren't forced to have a fixed width: "i" is much thinner than "m". Let's see a true type font definition:
FONT* my_font_name = "font_name_in_windows#height(type)"; // true type font
- my_font_name is the name chosen by you for the font, for example
arial_font;
- font_name_in_windows is the name of the font as it appears in Windows' \fonts
folder. You should use "Arial", "Times" (Times New Roman) and "Courier" here; these
fonts are guaranteed to be installed on any PC that runs Windows;
- height is the height of the font character in points, just like
in your word processor.
- type can be omitted (normal), or set to b
(bold), i (italic), or bi
(bold + italic), just like in your word processor;
And now let's see a true type font example:
FONT* arial_font = "Arial#20b"; // Arial, bold, a character has a height of 20 points
Bitmap fonts
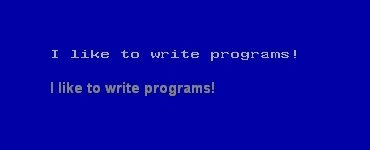
If you choose to use a bitmap font, "i" and "m" will have the same width, so your text will look something like this:

Those red squares will not appear on the screen; I drew them because I wanted you to see that all the characters have the same width. Take another look at the same text, this time without the red squares:

Let's see a bitmap font definition:
FONT* my_font_name = "bitmap_name"; // fixed width font
- my_font_name is the name chosen by you for the font, for example
adventure_font;
- bitmap_name is the name of the bitmap used for the font; either 11
numbers, or 32x4 characters, or 32x8 characters.
Let's see a bitmap font example:
FONT adventure_font = "adventure.pcx"; // uses a bitmap named adventure.pcx
Everything looks nice but what is it with that bitmap? Well, if you are going to use a bitmap font you will have to create all the characters for it by yourself. You create a black (RGB = 000) rectangle and you draw your characters inside it. The sequence of alphanumerical characters in the bitmap must correspond to the character set used by the script. Here's an example (you can ignore the small red rectangles or you can add other characters to the font):

There should be 32 characters per row, ordered in four rows (32 characters x 4 rows = 128 characters in my example) or in eight rows (256 characters). If you don't plan to use letters, you can create a smaller font bitmap that looks like this (11 characters x 1 row, contains 0...9 and space):

Important note: the bitmap must have exactly 11 times (11 x 1), 128 times (32 x 4) or 256 times (32 x 8) the given character size. If you decide to create a font that has a character size of 10 x 20 pixels and uses 32 characters and 4 rows, the size of the resulting bitmap must be 320 x 80 pixels, get it? If you don't respect this rule you will fail to create a usable font.
The bitmaps for those fixed width fonts are pretty hard to create, aren't they? Before you start pulling your hair off, you can find a "font generator" tool at Conitec's "Links" page. Choose the name of the font, set its size and then press a button to generate the bitmap automatically.
Let's see some pros and cons for these two types of
fonts:
|
Font |
Creation |
Pros |
Cons |
Other |
|
True Type |
No need to |
Variable width |
Single color |
Only a few true type fonts (Arial, Times,
Courier) |
|
Bitmap |
Time consuming |
Multicolored |
Fixed width |
Can be used to display all kinds of
symbols |
So what type of font are you going to use? Will it be a true type font or a bitmap font? The texts look really good if you use a true type font but you can't afford to use a font that isn't installed on all the PCs. On the other hand, a bitmap font can be displayed on any pc because you will distribute the bitmap together with your game.
Let's see how these fonts look like and then you should be able to choose the best type of font for your projects; I encourage you to use both types for the same project if you need to.
Start Lite-C and then load the script07_2 file:
////////////////////////////////////////////////////////////////////
STRING* test_str = "I like to write programs!";
FONT* system_font = "system.pcx"; // bitmap, 10 x 12 pixels for a character
FONT* arial_font = "Arial#25b"; // true type, Arial, bold, size = 25
////////////////////////////////////////////////////////////////////
TEXT fixed_width_txt
{
pos_x = 200;
pos_y = 250;
font = system_font;
string(test_str);
flags = SHOW;
}
TEXT true_type_txt
{
pos_x = 200;
pos_y = 280;
font = arial_font;
string(test_str);
flags = SHOW;
}
////////////////////////////////////////////////////////////////////
This script includes two font definitions and two texts that use different fonts and the same test_str string. Let's run the script7_2 script:
 system.pcx= the bitmap used for the bitmap font
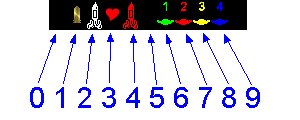
I have told you that the engine won't care if you don't paint nice figures and letters on the font; you can use bitmapped fonts to display pictures, weird symbols and so on. Here's an example from one of Alain Brégeon's multiplayer workshops that can be downloaded from the AU resource website:
If the font would be named icons.bmp, its definition would look like this:
FONT icons_font = "icons.bmp";
Let's define a panel that uses this font and a digit:
PANEL some_pan
{
pos_x = 0;
pos_y = 0;
digits (410, 200, 1, icons_font, 1,
picture);
flags = OVERLAY | SHOW;
}
If the variable named picture is set to 2, the digit will display a white rocket; if picture is 3 we will see a little red heart. If picture is 4 we will see the red rocket and so on, get it? You could replace the pictures with any other weird symbols to create an alien alphabet or stuff like that.
Ready for a new challenge? Try to write the code that switches the fonts for the two texts, three seconds after the level is loaded, like below:
three seconds later....

Solution: add 3 lines of code to function main:
function main()
{
...
wait(-3); // wait for 3
seconds
fixed_width_txt.font = arial_font; //
switch the fonts
true_type_txt.font = system_font; // for
the 2 texts
}
Next: Position, angle and scale