The device window (referred to as Document in the script command set) appears when double clicking a device from the Device Tree. Every device window is connected to the single programmer or gang programmer that was active when selecting the device. This way, by opening several device windows, GalepX can program different devices on different programmers at the same time. Alternatively, a device window can affect several GALEP programmers when they were combined to a gang programmer.
The title bar shows the selected device and the connected programmer. The tabs of the window differ dependent on the type of device.
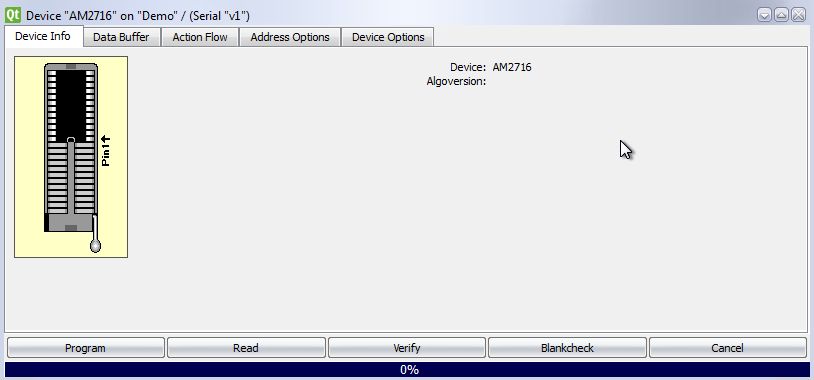
This panel displays the placement of the device or socket adapter in the socket, plus optionally some information about the device and algorithm version. Most devices and adapters are inserted with the device's pin # 1 directed to the lever of the GALEP socket and with the opposite end of the device aligned to the opposite end of the socket (see image above). Positioning your device into the GALEP socket should be done carefully, with regard to correct pin orientation.
!! Although GALEP performs a connection check before programming a device, wrong inserted devices can be permanently damaged. If a device is incorrectly inserted even once, it should not be used any more, as it's correct function can no longer be guaranteed. Incorrectly inserted devices can also cause damage to the GALEP and will void it's warranty
Depending on the devices, one or more option tabs appear in the device window.
The Address Options tab allows to set the buffer start and end address in the address space of the device. This allows to program a device from an area of a larger buffer.
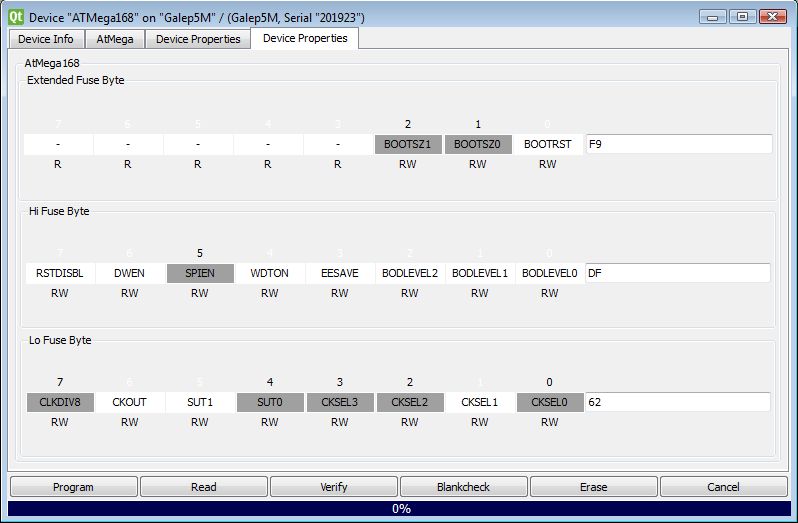
The Device Options tab allows to set fuse bits, lock bits, or other device specific flags. Usually the flags correspond to the register description in the device data sheet, which allows easy identification of the bits. If there are more device properties than fit onto a single page, several Device Option tabs may appear.
The Action Options tab contains settings that affect programming or other device operations. The programming algorithm (serial or parallel), the transfer speed, the device clock frequency, the memory type to be programmed or read, or similar options can be set up here. Details can be found in the documentation of the device.
The SPI Options tab is for setting up In System Programming with the ISP adapter. Voltages and frequencies to be supplied to the target board can be set up here. Details can be found in the documentation of the adapter and device.
Under the Data Buffer tab, the device memory content can be edited, and operations such as split, shuffle, swap, compare, checksum, etc. can be preformed between different buffers or files. Details can be found in the following chapter.
The Action Flow tab allows to set up options such as continuity test, device detection, autostart, or serial numbers. Details can be found in the following chapter.
| Program | Program and verify the Data Buffer content. This action is also automatically executed by the GALEP-5D front button when no script is assigned to the button. |
| Read | Read the device content into the Data Buffer. |
| Verify | Compare the device content against the Data Buffer. Detailed comparisons against files or checksums are possible with Buffer Operations. |
| Blankcheck | Check if the device is erased. |
| Erase | Erase the device. |
| Cancel | Abort the current operation. |
Dependent on special features of the selected device, additional buttons or an entirely different button set may appear - in this case please refer to the documentation of the device. The available device actions can be listed through the gxGetActionList script command.
The progress bar below the operation buttons shows the progress of the current action. At the end of the operation, the progress bar indicates success or failure with green or red color.
► latest version online