Using the mouse. Mouse events
Lite-C can be used to create any type of game you can think of and the built in mouse code isn't lagging behind. There are three mouse modes to choose from; each one of these modes can be set using a simple line of code that looks like this:
mouse_mode = 0; // we can use 0, 1, 2, or 4 here
Well, you've guessed it again: mouse_mode is a predefined variable; you can read more about it in the reference manual.
Set "mouse_mode = 0;" and the mouse pointer will become invisible, as if the mouse didn't exist at all (a good setting if you plan to create racing games, shooter games, etc). Use "mouse_mode = 1;" when you want to create a pointer that is visible and also able to control the camera position or angles (first / third person action games, role-playing games, etc). Set "mouse_mode = 2;" to get a pointer that is visible and moveable, but can't control the camera. This is the mode for clicking objects, etc (strategy games, board games, etc). And finally, setting mouse_mode = 4; lets the mouse automatically follow the Windows mouse; we've used this mode in Workshop 06. Don't bother to learn all this stuff now; we will see all these mouse modes in action pretty soon.
Start Lite-C, and then open and run script14.c. It looks like our level with the two wizards, but nobody seems to be at home this time ... move the mouse around and you will be able to change the camera pan and tilt angles.
Press the [M] key once and witness the miracle:
A gray crosshair came out of nowhere! I can move the
camera around and the crosshair changes it position too!
Press [M] one more time and you will see a cursor on the
screen:
Now that's intriguing! The cursor can be moved around but the camera doesn't change its angles anymore!
You can press [M] as many times as you want in order to test the three mouse modes; and while you're doing that we will take a look at the code inside the script14.c file:
////////////////////////////////////////////////////////////////////
#include <acknex.h>
#include <default.c>
////////////////////////////////////////////////////////////////////
BMAP* cursor_pcx = "cursor.pcx";
BMAP* crosshair_pcx = "crosshair.pcx";
////////////////////////////////////////////////////////////////////
function change_mouse_mode()
{
   mouse_mode += 1;
   mouse_mode %= 3;
   if (1 == mouse_mode)
      mouse_map = crosshair_pcx;
   if (2 == mouse_mode)
      mouse_map = cursor_pcx;
}

function main()
{
   video_screen = 1;
   video_mode = 7;
   level_load ("work14.wmb");
   on_m = change_mouse_mode;
   while (1)
   {
      mouse_pos.x = mouse_cursor.x;
      mouse_pos.y = mouse_cursor.y;
      camera.pan -= mouse_force.x;
      camera.tilt += mouse_force.y;

      wait (1);
   }
}
The code doesn't look too complicated; we've dealt with some of these things before, right? We have defined two bitmaps for the cursor and the crosshair; you can see the actual picture files inside the workshop14 folder. Now let's examine the code inside function main:
function main( )
{
video_screen = 1;
video_mode = 7;
level_load ("work14.wmb");
on_m = change_mouse_mode;
while (1)
{
mouse_pos.x =
mouse_cursor.x;
mouse_pos.y =
mouse_cursor.y;
camera.pan -= mouse_force.x;
camera.tilt +=
mouse_force.y;
wait (1);
}
}
The first line of code sets the predefined video_screen variable to 1, making the program run in full screen mode. Yes, it's that simple! You can add this line to any other game or application that you are designing and it will start running in full screen mode from its very beginning. Of course that you can change to window mode by pressing the standard "Alt + Enter" key combination.
The following lines inside function main set the screen resolution to 800 x 600 pixels and tell Lite-C to load the work14.wmb level. The 4th line of code binds function change_mouse_mode to the "M" key on our keyboard, making sure that it will be called each and every time when the player presses the "M" key. Then, we repeat a few lines of code inside a while (1) loop. Let's take a closer look at the first two lines of code:
mouse_pos.x =
mouse_cursor.x;
mouse_pos.y =
mouse_cursor.y;
The predefined variables named mouse_pos.x and mouse_pos.y control the position of the mouse pointer on the screen; if I set mouse_pos.x = 200 and mouse_pos.y = 300 (just an example), the pointer appears on the screen just like in the picture below:

Guess what? The predefined variables named mouse_cursor.x and mouse_cursor.y convert the mouse movement to screen coordinates in pixels - that's exactly the data that was needed for mouse_pos.x and mouse_pos.y! I wonder if they did that on purpose... Anyway, you don't have to remember the entire story; just put the two lines of code inside a while loop and you will be able to use the mouse in any project. Oh, and don't forget to add the "wait (1);" instruction inside any of your loops!
Let's take a look at the following two lines of code:
camera.pan -= mouse_force.x;
camera.tilt +=
mouse_force.y;
Ok, so we're changing the camera pan and tilt using mouse_force.x and mouse_force.y; these are two predefined variables that store the speed with which the mouse is being moved horizontally (mouse_force.x) and vertically (mouse_force.y). Whenever you stop the movement, mouse_force.x and mouse_force.y are set to zero; however, if the mouse is moved, their values can range from -1 to 1. I didn't use a time / frame rate correction here, but I am sure that you can fix that (hint: multiply the right side of the expressions with something like 5 * time_step).
Let's see the code for the function that changes the predefined variable named mouse_mode:
function
change_mouse_mode()
{
mouse_mode += 1;
mouse_mode %= 3;
if (1 == mouse_mode)
mouse_map = crosshair_pcx;
if (2 == mouse_mode)
mouse_map = cursor_pcx;
}
It is pretty clear that this function runs when we press the [M] key. When we start the game, mouse_mode is set to zero (that's its default value) and the mouse pointer doesn't show up. As soon as we press the [M] key, function change_mouse_mode runs once and then it stops. Let's discuss the first two lines of code:
mouse_mode += 1;
mouse_mode %= 3;
You should remember that "mouse_mode += 1;" is just the shorter version of "mouse_mode = mouse_mode + 1;". Both expressions do the same thing: increase mouse_mode by 1. The initial mouse_mode value was zero, so now mouse_mode will be set to 1. The pointer shows up as a crosshair that can be moved around and the mouse controls the camera at the same time. This is the mouse mode that should be used for an action or a role-playing game (RPG).
The second line of code "mouse_mode %= 3;" is the shorter version for "mouse_mode = mouse_mode % 3;" right? The modulo operator (%) is the remainder of a division between two numbers; for instance 14 % 3 = 2 because 14 = 3 * 4 + 2 and the remainder of the operation is 2.
Why do we need to use this modulo operator? Mainly because we can easily set the range of the values that result from an operation. If we use "some_number %= 3;" we can be sure that "some_number" can only be 0, 1 or 2. If we use "some_other_number %= 7;" we can be sure that "some_other_number" can only have one of these values: 0, 1, 2, 3, 4, 5 or 6.
It might look a bit weird, but we need to use the modulo operator in order to set mouse_mode to a valid, accepted value: 0, 1 or 2. What would happen if the player would press "M" five times? We can't allow mouse_mode to be set to 5! The second line of code makes sure that mouse_mode = 2 when we press "M" five times because 5 = 3 * 1 + 2, with 2 being the remainder. You can press "M" for as many times as you want because mouse_mode will change its value this way: 0, 1, 2, 0, 1, 2, 0, 1, 2, ...
Let's take a look at the rest of the code inside function change_mouse_mode:
if (1 == mouse_mode)
mouse_map = crosshair_pcx;
if (2 == mouse_mode)
mouse_map = cursor_pcx;
These lines of code change the mouse pointer bitmap (predefined as mouse_map) into one of our bitmaps: crosshair_pcx or cursor_pcx. That's all the code there is to be discussed in this script file! You can see that we aren't using any code to hide the mouse pointer when mouse_mode is set to zero; the engine does that by itself. It wasn't needed to change the mouse pointer bitmap either, but I wanted to show you how and when you should use a certain type of mouse pointer.
The variables named mouse_force.x and mouse_force.y respond to mouse movement (have non-zero values that can be used in our scripts) only if mouse_mode is set to 0 or 1. Don't expect to be able to move the camera around using the mouse if you have set mouse_mode to 2; that's the mouse mode that should be used for strategy games, board games, etc.
You can mix all the three mouse modes in a single game, just like I did in this workshop. If you want to have a cut scene, you will want to hide the mouse pointer while the characters are talking to each other (mouse_mode = 0); as soon as the cut scene has finished you will want to switch to mouse_mode = 1 or mouse_mode = 2, depending on what type of game you are creating.
Are you ready to try something new? Copy and paste these lines of code into the while loop of function main:
if (mouse_left)
camera.ambient += 1;
if (mouse_right)
camera.ambient -= 1;
The resulting while loop should look like in the image below (the new lines of code are green):
...
while (1)
{
mouse_pos.x = pointer.x;
mouse_pos.y = pointer.y;
camera.pan -= mouse_force.x;
camera.tilt += mouse_force.y;
camera.tilt += mouse_force.y;
if (mouse_left)
camera.ambient += 1;
if (mouse_right)
camera.ambient -= 1;
wait (1);
}
}
Run the level again and you will notice something interesting: you can increase and decrease the ambient light in the level by holding down the left or right mouse buttons. The trick is really simple: different camera.ambient values translate to different ambient lights in our levels. What we don't know (yet) is that the mouse buttons use some predefined variables named mouse_left, mouse_middle (not used here) and mouse_right, that are set to 1 (or "true") when the corresponding mouse buttons (left, middle and right) are pressed and are set to 0 (or "false") when those mouse buttons aren't pressed.
Does this line of code ring a bell?
if (key_w)
........
Yes! We have used it to change one of the angles for the camera in our previous workshop! The same method can be used for the three mouse buttons; replace "if (key_something)" with "if (mouse_something)" and you will be able to control the things using the mouse in a similar way! Don't forget that mouse_something can only be mouse_left, mouse_middle or mouse_right, though.
Mouse events
Did you know that we use the mouse and interact with the objects in a 3D world? Just open and run the script14_2.c file. You will see the good old hut with the two wizards; now move the mouse pointer over one of them and see what happens!
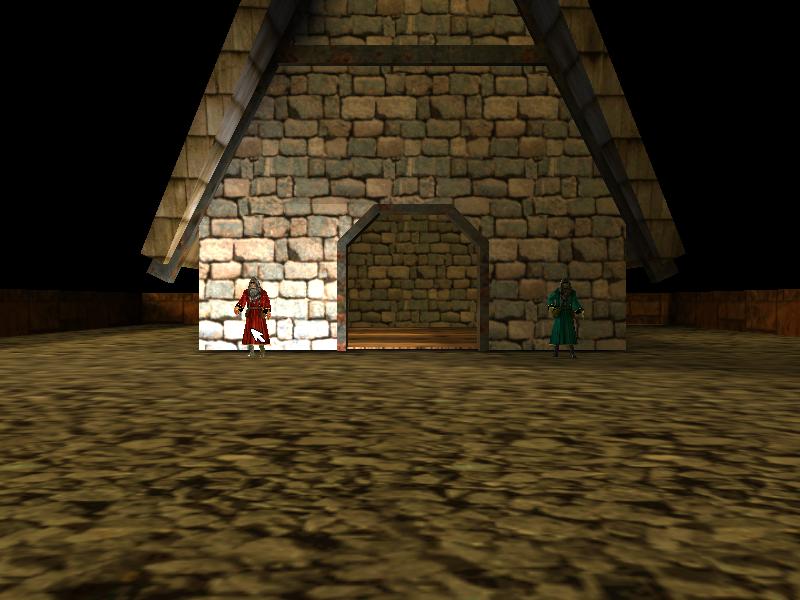
The wizard must have cast a spell because he lights up and illuminates his surrounding environment!
What has happened here? We have used an event function, which tells the entity how to react when it is touched or clicked on with the mouse. Take a look at script14_2.c:
////////////////////////////////////////////////////////////////////
#include <acknex.h>
#include <default.c>
////////////////////////////////////////////////////////////////////
BMAP* cursor_pcx = "cursor.pcx";
BMAP* crosshair_pcx = "crosshair.pcx";
////////////////////////////////////////////////////////////////////
function highlight_event()
{
  if (event_type == EVENT_TOUCH) // the wizard was touched with the mouse?
  {
    my.ambient = 100; // the make it look bright
    my.lightrange = 200; // and generate light on a radius of 200 quants!
  }
  else if (event_type == EVENT_RELEASE) // the mouse was moved away from it?
  {
      my.ambient = 0; // then restore its initial ambient value (zero)
      my.lightrange = 0; // and stop it from generating light around it
  }
}

action wizard_lights() // this action is attached to both wizards
{
// make the wizard models sensitive to mouse touching and releasing
  my.emask = ENABLE_TOUCH | ENABLE_RELEASE;
// run function highlight_event the wizards are touched or released
  my.event = highlight_event;
}

function main()
{
  video_screen = 1; // start in full screen mode
  video_mode = 7; // use a screen resolution of 800 x 600 pixels
  level_load ("work14_2.wmb"); // load the level
  mouse_mode = 2; // show the mouse pointer
  mouse_map = cursor_pcx; // set the mouse pointer bitmap
  while (1)
  {
      mouse_pos.x = mouse_cursor.x; // allow the mouse pointer to move
      mouse_pos.y = mouse_cursor.y; // on the x and y axis
      wait (1);
  }
}
Just like the [M] key was triggering our change_mouse_mode function at the beginning of this workshop, various things happening to entities can trigger special functions named event functions.
action wizard_lights() // this action
is attached to both wizards
{
my.emask = ENABLE_TOUCH |
ENABLE_RELEASE;
my.event = highlight_event;
}
Note that the object.property method is being used here as well:
1) The emask property sets the type of events that will trigger the event function (mouse touching and mouse releasing in our example). This means that the wizard's event function will be run when the player touches the wizard, as well as when the player mouse the mouse pointer away from the (previously touched) wizard. You can find the full list with the event types in the Lite-C manual.
2) The event property sets the name of the function that will be run when one of the events are triggered. In our case, function highlight_event will be run each and every time when one of the wizards is touched or when they mouse is moved away from it.
Now what happens when one of the wizards is being touched with the mouse?
function highlight_event( )
{
if (event_type ==
EVENT_TOUCH)
{
my.ambient = 100;
my.lightrange = 200;
}
else if (event_type ==
EVENT_RELEASE)
{
my.ambient = 0;
my.lightrange = 0;
}
}
First of all, we must decide what type of event has triggered our function; to do this, we need to use the predefined event_type variable. Lite-C includes a mechanism that triggers the events and sets event_type to the proper value at the same time; this means that all we have to do is to compare event_type with a few predefined values in order to find out which type of event was triggered.
If event_type is set to EVENT_TOUCH, we know that our entity was touched with the mouse. Since the predefined "my" pointer is set to the touched wizard and works in the event function as well, we can use it to manipulate the entity's properties. We're now setting the entity's ambient value to 100 percent, making it look bright, and then we are setting its lightrange property to 200, which means that everything within 200 quants is illuminated by the entity's internal, dynamic light. The "else" branch runs if the event wasn't EVENT_TOUCH, so it could be an EVENT_RELEASE. We check this by placing a further "if" condition behind the "else". If it's true, we reset the ambient and the lightrange properties (also know as "parameters") for our wizard.
Since this was almost two workshops in one, let's take a break.