Workshop 02: Variables
A variable is a place in your computer's memory (just like a container) that can be used to store numbers. Let's see a few lite-C examples:
var bullets = 7;
var health;
var lives = 3; // the player has 3
lives
These are a few short lines of code but we can use them to learn many new things:
1. Every variable must be defined before being used, using the keyword named var. If you write this line of code:
health = 100;
and you haven't defined the variable named health before using it, you will get an engine error message.
2. Any variable can receive an initial value at game start, but we aren't forced to do that when the initial value does not matter. Example:
var bullets = 7;
var lives = 3;
3. We can add our own comments to the code. Every time it encounters two slashes // the engine will ignore the words, expressions, symbols, etc that follow it. This way we can add useful comments to our code:
var car_speed; // the speed of the car
that chases the player
// @%$%&^& Ha Ha Ha! %^&**
I rule!
4. Every lite-C line needs to end with a semicolon. Many beginners forget to add ; at the end of their lite-C lines of code and this also leads to an error messages - not in the line with the missing semicolon, but in the following line!
5. lite-C uses a variable (var) that can have up to six digits, with up to three digits following the decimal; therefore, a var can store numbers from -999,999.999 to 999,999.999. If you need to use bigger numbers, you can also use other C/C++ variable types, like int, char, short, long, float, double and so on. However in this workshop we'll concentrate on var variables that are the best suited for 3D coordinates, and the most easiest to use.
6. Every variable name must start with a letter or with an underscore _. Here are some valid variable names:
var AlohA;
var _me_too;
var go42;
var Iamb19;
var _12345;
Now let's take a look at some bad var examples:
var #ItoldYou;
var 1_for_all;
var 12345;
I'll let you discover what is wrong in the var definitions above.
7. Variable names are case sensitive. This means that if we define a var this way:
var MyHeadShots;
and then we use it later in our code this way:
myheadshots = 5; // or
mYheadSHots = 5; // or
MYHEADSHOTS = 5;
the engine will not accept it.
8. You can define several variables in one line. This saves lines and keeps your code short. Example:
var health, strength, score;
var width = 7, height = 14, depth = 20;
9. Finally, the variables should have significant names. While it is possible to define a pile of variables that look like this:
var x32;
var a125;
var h_34_5;
var _z34187;
it isn't a good idea to do it this way. You will have problems trying to remember what these variables do if you look at your code a few weeks later. If you want to show your code to other people, they will have a hard time trying to figure what you wanted to do with your code. The var definitions below look much better, don't they?
var current_position; // current
position of the enemy
var number_of_goals;
var high_score;
var player_armor; // will be set to
100 when the game starts
Enough theory! Let's use these variables! Start the script editor SED and then press its Open button  . Navigate to the samples folder, open workshop02 and then double click the script02.c file inside it to open the lite-C file. Before continuing make sure that you have configured
Lite-C correctly. Click the menu named Options and then select Preferences and the Environment tab. Mark the Use
current file for Test Run option (if it
isn't already). This makes sure that the current file is started. Let's press
OK and then we will try our luck with Test Run: Click the triangle
. Navigate to the samples folder, open workshop02 and then double click the script02.c file inside it to open the lite-C file. Before continuing make sure that you have configured
Lite-C correctly. Click the menu named Options and then select Preferences and the Environment tab. Mark the Use
current file for Test Run option (if it
isn't already). This makes sure that the current file is started. Let's press
OK and then we will try our luck with Test Run: Click the triangle  button!
The engine starts. Your screen will become blue (yes, that's my favorite color). This happens because I've set the screen color in the script to blue. Don't be afraid, you'll learn how to set up different colors!
Let's get back to our screen; it should look like this:

This screen doesn't look too exciting just yet. Press the Tab key on your keyboard to show the console (the flashing cursor) and then type
a = 5;
and then press Enter. Press Tab again to hide the console. You will notice that a = 5 and c = 5 now. I wonder what's happening here...

Press Tab again, delete the existing text using the Backspace key and then type the following line of code:
b = 3;
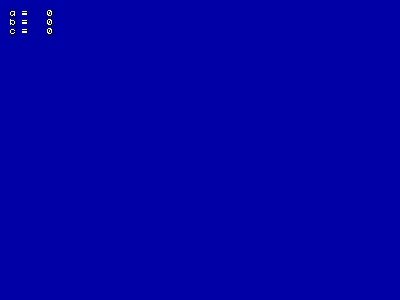
Press Enter - the screen should look like this:

Starting to make sense of this, isn't it? It looks like c is the sum of a and b; try to type several values for a and b and you will convince yourself. Now let's close the engine window by pressing [Esc] and let's take a look at the miraculous piece of code that transforms our beloved engine in a simple calculator. This is the code of script02.c that you see in the script editor SED:
////////////////////////////////////////////////////////////////////
#include <acknex.h> // the pure mode header, normally always at the beginning
#include <default.c>

var a = 0;
var b = 0;
var c = 0;

/////////////////////////////////////////////////////////////////////
PANEL* panDisplay =
{
	digits(35, 10, "a = %0.f", *, 1, a);
	digits(35, 19, "b = %0.f", *, 1, b);
	digits(35, 28, "c = %0.f", *, 1, c);
	flags = SHOW;
}

/////////////////////////////////////////////////////////////////////
function main()
{
  screen_size.x = 800;
  screen_size.y = 600;
  screen_color.blue = 150; // dark blue
  while (1)
  {
     c = a + b;
     wait (1);
  }
}
If you think that this piece of code is too complicated, don't worry: we will only discuss the red lines of code in this workshop. Whew... I felt quite a sense of relief when I heard that - did you?
var a = 0;
var b = 0;
var c = 0;
These are three simple var definitions. Now I know that I need to define a var this way if I want to use it later in my game.
c = a + b;
This line of lite-C code appears to be simple too; it makes c equal to the sum of a and b. Let's make a small experiment. Find the line of code “c = a + b;”, and then delete the "+" sign, replacing it with a "-". The edited line should look like this:
c = a - b;
Save the script, and then press the Test Run button again .
I can see the good old blue screen! Let's type these values in (don't forget to press Tab):
a = 2;
b
= 5;
and the result is c = -3! It really works!

You have now mastered the basics of lite-C, haven't you? Let's make a small experiment; we were told that any variable (var from now on) can receive an initial value. Is that true? Let's check that right away: edit the values for a and b in your script file to make them look like this:
var a = 20;
var b = 5;
var c = 0;
Let's Test run our level
again, shall we?
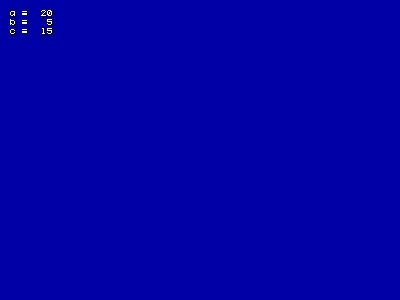
The engine has read the new values and it has subtracted 5 from 20, displaying the correct result: 15. I know it's not a game what we're doing here, but it is pretty fun! So now we know how to add and subtract values; we can also use * to multiply two numbers or / to divide them. We could replace the line that does the “c = a + b;” calculation with much more complex expressions but I kind of hate math so let's discuss about something else...
Do you remember the first lines of code below the function main? I didn't forget them:
screen_size.x = 800;
screen_size.y = 600;
screen_color.blue = 150;
Lite-C knows how to deal with two types of variables: predefined and user defined vars. Some variables are already predefined inside lite-C by its creators; these are the engine variables and they are controlling some features of the engine. The predefined screen_size is a vector - a special variable that has not only one but several values, here indicated by the .x or .y after variable name. It's used by the engine to set the initial screen resolution at startup (800x600 pixels in my example). screen_color.blue sets the blue component of the screen color. Don't worry, we'll learn about vectors later. For a complete list of predefined variables check the reference manual.
Feeling tired? Me too. Let's take a break.